
Plain walls can feel flat and unfinished. Picture-frame molding adds depth, shadow, and style with simple trim. With basic tools and smart planning, this DIY home project fits into a weekend. You will learn layout, cutting, and trim installation for high-end wall decor that looks built in.
Planning Your Picture-Frame Molding Project
Good planning shapes your DIY Picture-Frame Molding for High-End Walls from the start. Choices about layout, molding materials, and proportions guide the whole accent wall design. A clear plan saves cuts, paint, and time.
Measure and sketch the layout
Measure each wall top to bottom and side to side. Mark ceiling height, baseboard height, and outlets. Then test the layout on paper and on the wall.
- Use graph paper or a simple design app like SketchUp for a scale sketch.
- Set a standard gap between boxes and edges. Nikki and Caitlin used 3 inches for vertical spacing. Ashley used 3.5 inches. Caitlin set 4 inches on horizontal gaps.
- Try painter’s tape or cardboard templates on the wall. This shows proportion before cutting.
- Use a laser level to keep lines straight and consistent across the room.
Vertical lengths should match from box to box for symmetry. Horizontal lengths change by wall width, which is normal. Caitlin confirmed sizes with Inch Calculator and simple 3D diagrams, which helped avoid waste.
Choose the molding style and profile
A profile is the shape of the molding’s face. Flat profiles give a clean, modern look. Rounded or beveled profiles add shadow and depth. Ornate trim fits formal rooms; simple casing fits casual spaces.
Common choices include finger-jointed base cap molding or primed pine casing. Ashley used primed pine for a chunkier look at about $0.91 per foot. That came to around $300 for 300 plus feet in a guest bedroom.

Material affects tools and finish quality:
- Wood is strong, cut with a miter saw, stains or paints well.
- PVC is light, cuts easily by hand, stable in humid rooms.
- Polystyrene is budget friendly, easy to trim, paints well.
- Metal or aluminum trim needs special blades, very durable.
Corner blocks or ornate corners can add interest, but they are optional. Match material to the room and the process you prefer. That choice shapes both installation and final style.
Gather necessary tools and materials
Set up a basic carpentry kit. It keeps the project smooth and safe.
- Miter saw, or a miter box for hand cuts
- Brad nailer with 18 gauge brad nails, Nikki used her own to save money
- Level or cross line laser level for accurate trim installation
- Tape measure, stud finder, speed square, and pencil
- Painter’s tape for layout tests
- Construction adhesive for extra hold
- Safety glasses and hearing protection
Materials checklist:
- Molding in 8 to 12 foot lengths. PVC 12 foot pieces are light, but long.
- Drywall compound for patching, plus a putty knife
- Primer and paint
- Caulk and a caulk gun, silicone trim sealant for humid areas
- Wood filler or painter’s putty
- Sandpaper, 120 and 220 grit
Ashley used Arrow Fastener tools for a wainscoting project, which worked well. Keep colors like “Polar Bear” or “Swiss Coffee” in mind if you want a classic white finish.
Preparing the Walls
Clean, smooth walls help molding sit flat and look crisp. Painter’s tape makes it easy to preview your wall enhancement before any nails go in. A little prep leads to tighter joints and better paint.
Patch holes and imperfections
Scan walls for dents, popped screws, and nail holes. Fill with spackle, painter’s putty, or wood filler using a putty knife. Follow dry times listed on the product.
Sand smooth with 220 grit until the area feels flat. Refill and sand again if needed. A seamless surface gives paint a uniform look later.
Use painter’s tape to visualize the design
After repairs, map out the pattern using painter’s tape. Nikki, Caitlin, and Ashley used this step to fine tune spacing and box sizes. Tape lets you move lines in minutes, no holes required.

Try a few options. Adjust height, width, and margins around doors and windows. Tape gives instant feedback on proportion and flow. This simple test cuts down on mistakes during trim installation.
Smooth textured walls if needed
Heavy texture, like knockdown, can keep molding from sitting flat. Apply a thin skim coat of joint compound, which is drywall mud. Let it dry, then sand until smooth to the touch.

Some walls need two passes in rough areas. Protect floors first for easier cleanup. A smooth surface supports a Level 4 to Level 5 finish, which means very even paint with minimal texture. For very uneven walls, thin hardboard backer strips can help. Prime after sanding so paint bonds better.
Cutting and Installing the Molding
Now the project starts to show. Careful cuts, even spacing, and clean fastening turn a plan into custom decorative framing with real impact.
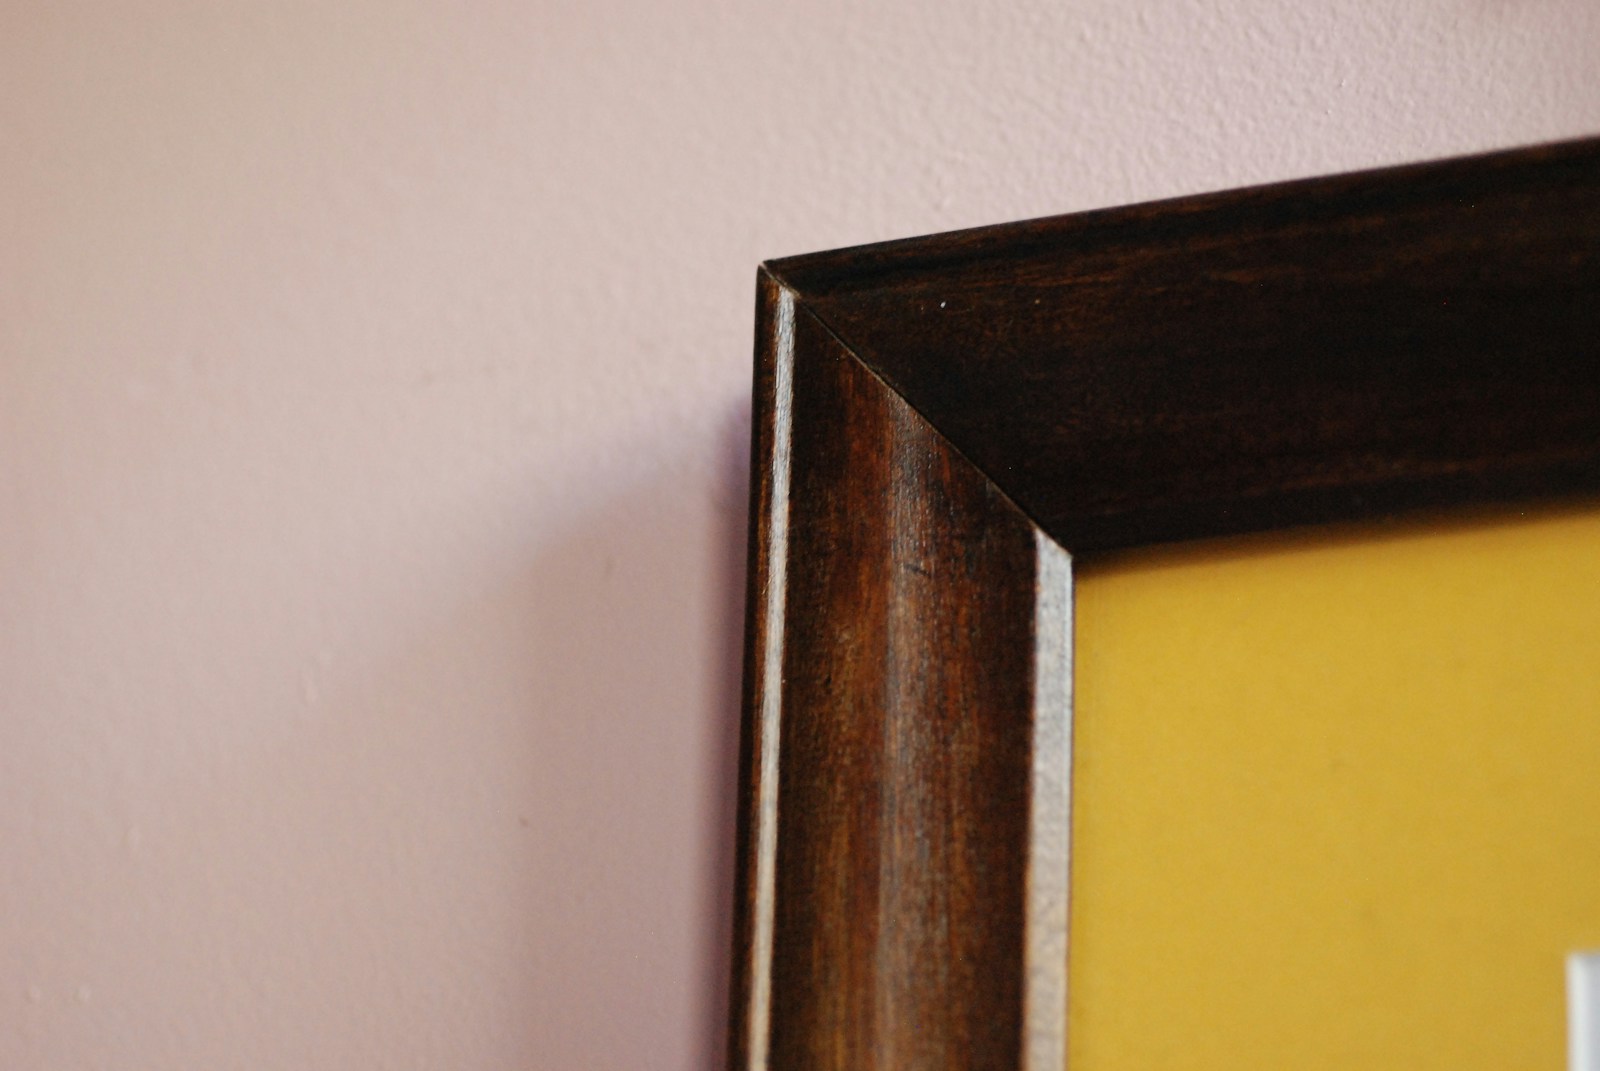
Cut molding pieces at 45-degree angles
Miter cuts create tight corners. Set the miter saw to 45 degrees and test on scrap. Measure twice, then mark the outside length on each piece.
Cut and check with a speed square for accuracy. Start with the longest verticals to limit waste, then cut horizontals to fit each box. Take thin trims off the ends to fine tune the fit. That slow approach gives tidy joints with no gaps.
Use spacers for consistent alignment
Consistent gaps make the wall look high-end and custom. Cut a spacer block to your chosen width. Hold it between pieces as you install each side.
Spacing examples: Ashley used 3.5 inches. Nikki used 3 inches. Caitlin set 3 inches on verticals and 4 inches on horizontals. Keep three to four inches from edges, casings, or baseboards for balanced proportions.
Templates or painter’s tape can double check alignment before nailing. Even small spacing errors draw the eye. Spacers prevent drift from box to box.
Secure molding with a nail gun and brad nails
Use a brad nailer with 18 gauge nails, 1 to 2 inches long. Nikki’s brad nailer kept costs low and speed high. Add a thin bead of construction adhesive on the back of each piece, which reduces the need to hit studs every time.
For thin profiles, pin nails can reduce splitting. Sink nails just below the surface for easier filling. Follow tool manuals and wear safety gear. If unsure about electrical locations, use a wire detector or call a pro.
Finishing and Painting
Finishing makes the trim look like part of the house. Smooth seams, clean caulk lines, and even paint bring the design together. Small steps here boost the final result.
Fill nail holes with wood filler and sand smooth
Press wood filler, painter’s putty, or spackle into nail holes and joints. A small putty knife helps you pack the gaps. Let it dry fully.
Sand with 220 grit until the surface blends in. Inspect under bright light and refill tiny spots if needed. Smooth repairs disappear after paint.
Apply caulk to seal gaps and seams
Run a thin bead of DAP Alex caulk where molding meets the wall and at each corner. Move the angled tip at a steady pace for a small, even line. Caulk seals gaps that catch dust and shadows.

Smooth with a damp finger or cloth right away. Wipe off extra. Seal the top, bottom, and both sides. Let the caulk dry before painting so it does not crack.
Prime and paint for a polished look
Use a quality primer such as Zinsser Bullseye or Kilz. Primer hides repairs and helps paint stick. Brush or roll primer on molding and the wall inside the boxes for a uniform base.
Choose satin or semi gloss for trim. Light shades like Swiss Coffee or Polar Bear feel fresh and clean. Apply two coats for even coverage, especially over filled holes and seams. Paint baseboards, doors, and window casings in semi gloss for a durable match.
Bottom Line
DIY Picture-Frame Molding for High-End Walls turns a plain room into a tailored accent wall. The method is simple, the effect looks custom. Measure with care, cut clean miters, and focus on finish work. Those steps produce crisp lines and lasting style.
This project fits many interiors, from modern to traditional. Start on one wall if short on time. If a step feels complex, ask a skilled friend or hire a carpenter for an hour. With patience and the right molding techniques, your wall décor will look like it came with the house.